

HubSpot For SugarAI keeps your SugarAI Contacts, Leads and Accounts in sync with HubSpot contacts and companies, in one direction or both. Records sync in real time or on a schedule, with field mapping you control and no duplicates.
Configuration
Connect your HubSpot account, choose what syncs in which direction, and map the fields. Everything on this page is under Admin > HubSpot Api > Hub Spot in Sugar.
Connect to HubSpot
- In HubSpot, open Settings > Integrations > Private Apps (newer accounts: Development > Legacy apps) and create an app.
- On its Scopes tab, tick the eight scopes shown on the Connection tab: read and write for contacts and companies, objects and schemas.
- Copy the access token.
- In Sugar, open Admin > HubSpot Api > Hub Spot, paste the token and click Test Connection.
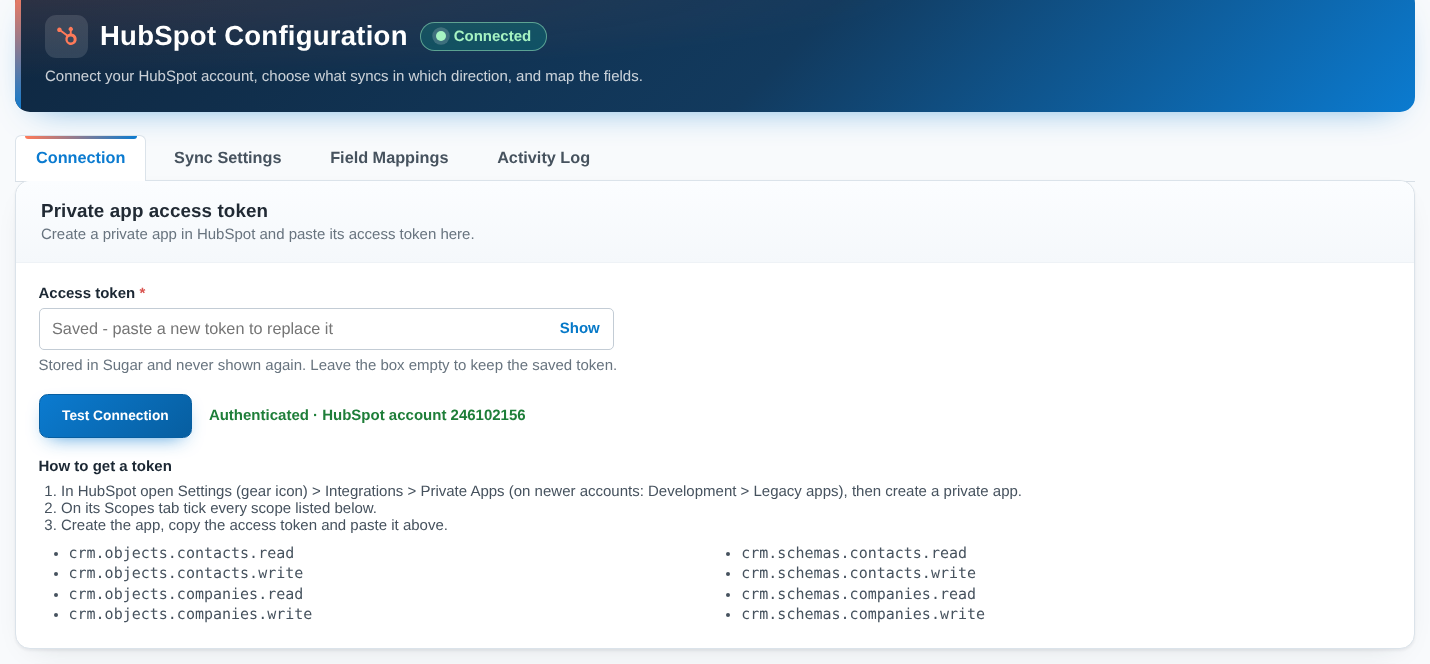
The badge turns Connected and the other tabs unlock. The token is stored and never shown again.
Choose what syncs
On Sync Settings, switch on the directions you need and click Save Settings.
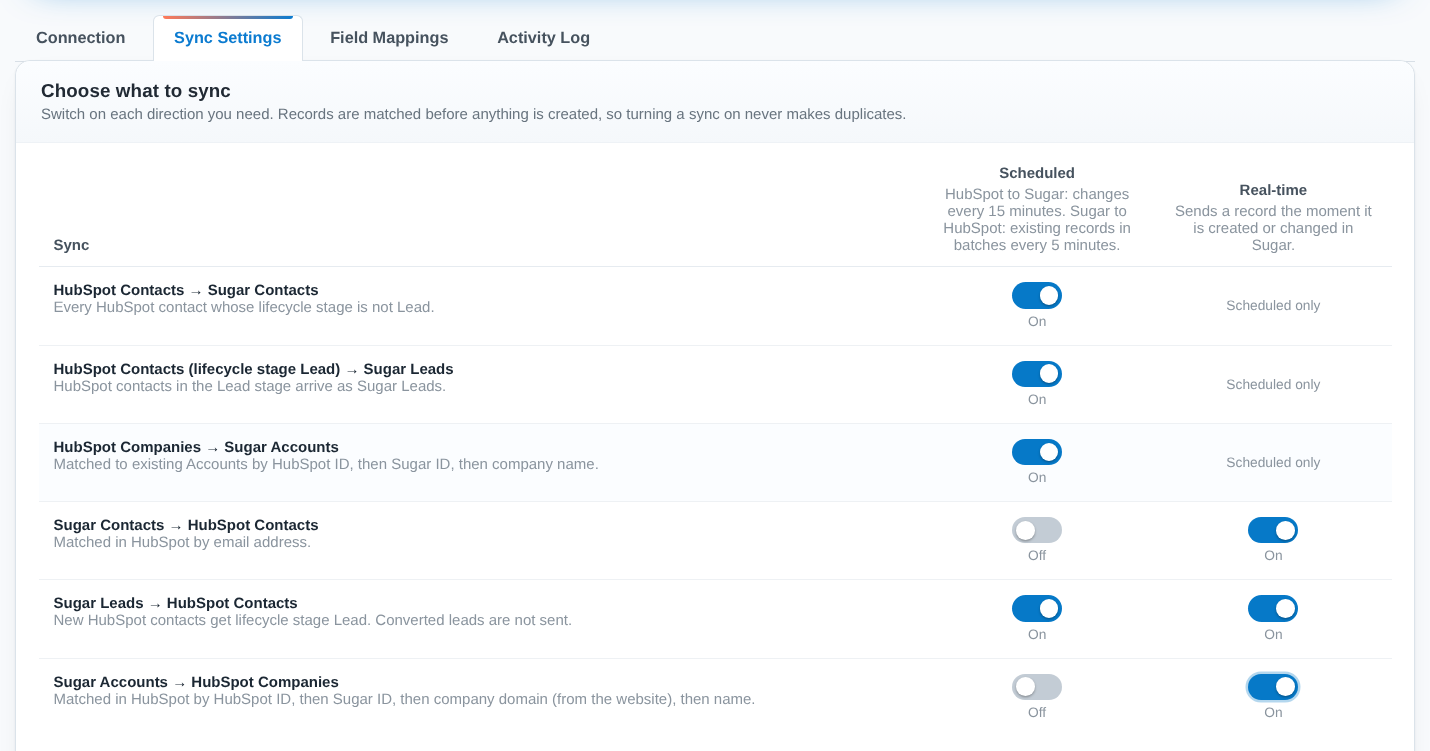
- Scheduled: HubSpot to Sugar every 15 minutes; changed Sugar records to HubSpot every 5 minutes.
- Real-time: a Sugar record is sent the moment it is saved.
Saving also adds a HubSpot ID field in Sugar, a Sugar ID property in HubSpot, and the background jobs.
Map fields
On Field Mappings, pick Contacts, Leads or Accounts, pair each HubSpot property with a Sugar field, choose a direction, and click Save field mappings.
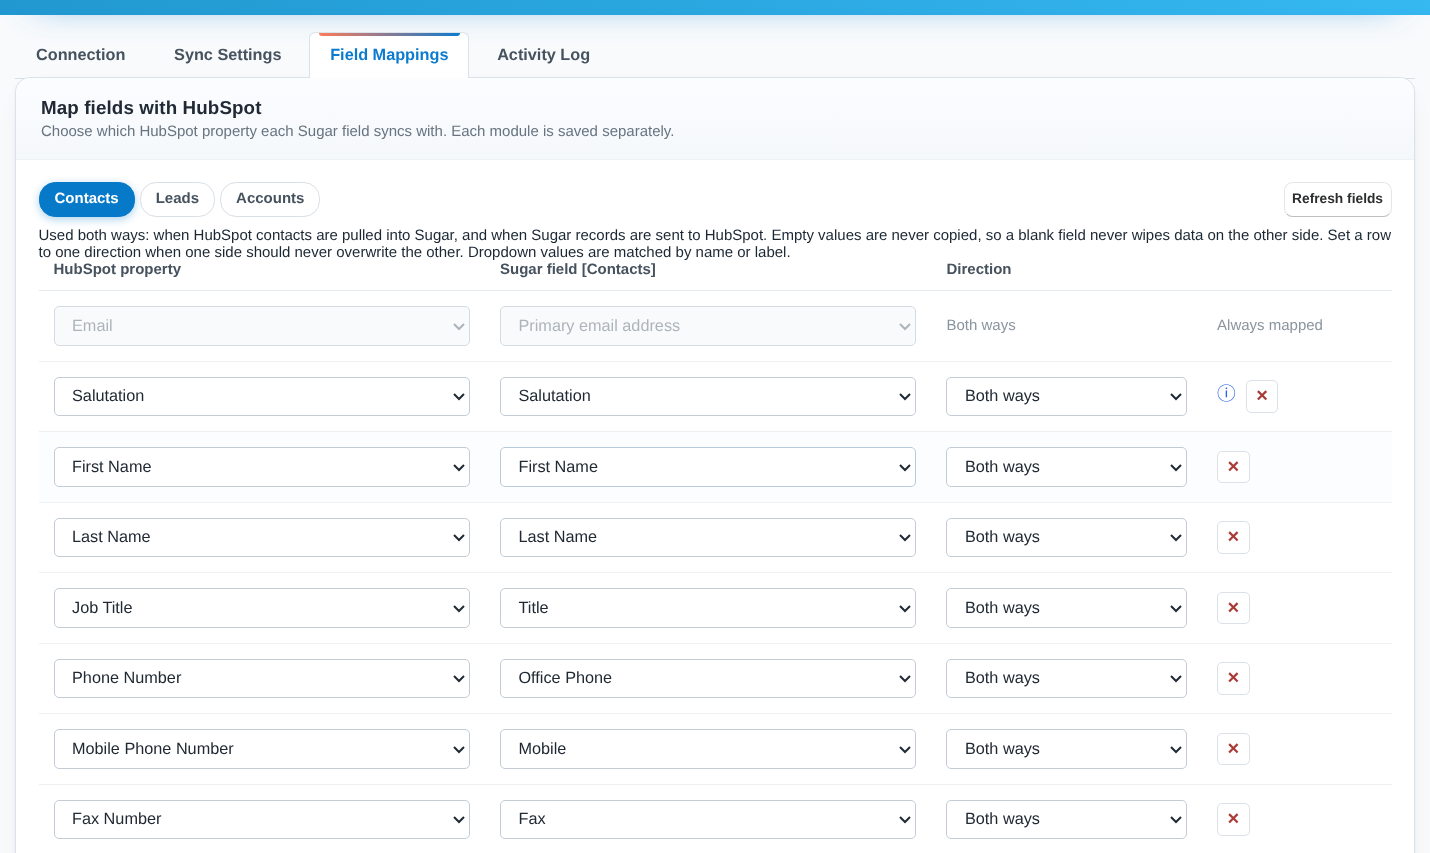
- Save a mapping for every module you send; a module with no mapping is not sent.
- Email is always mapped, because contacts and leads are matched by it.
- Empty values are never copied, so blanks never overwrite data.
- Use + Add field for more rows, and Refresh fields after adding new fields in HubSpot or Studio.
Background jobs and cron
Three schedulers run the scheduled syncs. They are created when you save your settings; see them under Admin > Scheduler.
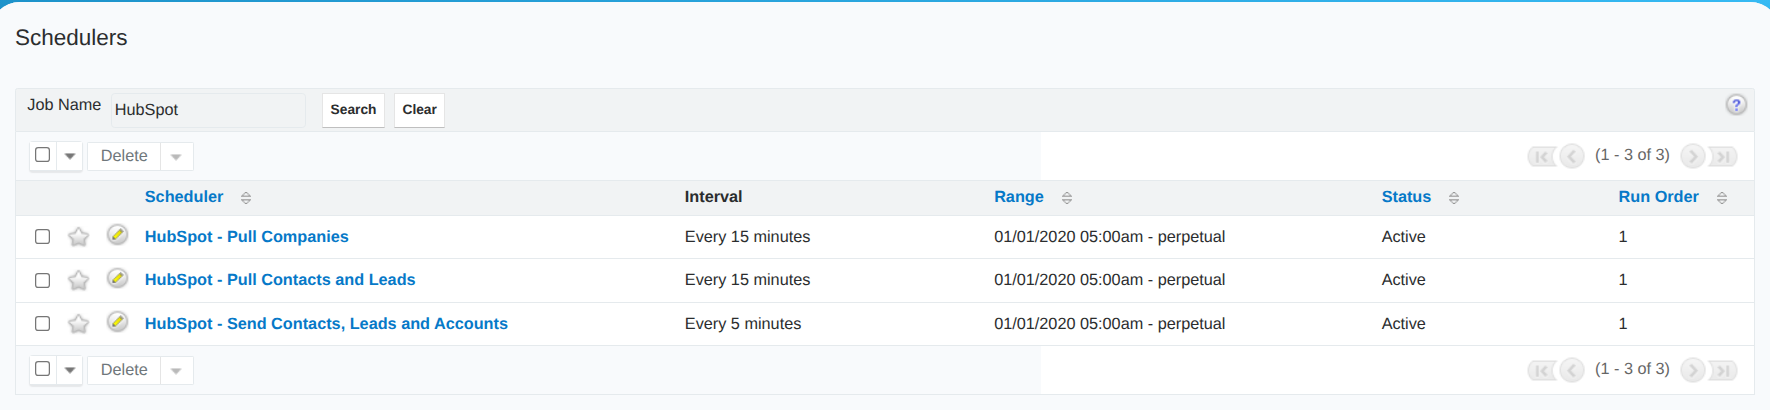 Scheduler" />
The schedulers need Sugar cron. On SugarCloud it is already running. On your own server, add a crontab entry for the web server user that runs cron.php in the Sugar directory every minute, as described in the SugarAI installation documentation.
Next: User Guide
 Saving Comment...